Create a Aethenos Instructor Account:If you don’t have one already, go to the Aethenos website and sign up for an instructor account by clicking “Instructor” in the top menu. You’ll need to provide some personal information and agree to the terms and conditions.
If you already have a Aethenos student account, you can use that same account to become an instructor and post a course.
Plan Your Course:Before you start creating your course, it’s essential to have a clear plan. Define your course topic, outline the content, and set clear learning objectives for your students.
Prepare Your Content:Gather all the materials you’ll need for your course, such as videos, presentations, quizzes, practice tests, assignments, coding exercises and any downloadable resources. Ensure your content is well-structured and organized.
Start Creating Your Course on Aethenos:
Log in to your Aethenos instructor or student account.
Click on the “Instructor” in the top menu.
Click the + Add Course icon
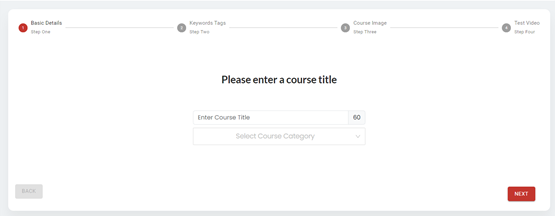
5. Course Title and Course Category:Fill in the course title and select a course category. Make sure your title is catchy and informative, and your course category is correct.
Click the NEXT icon
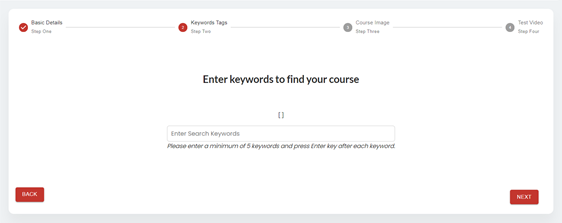
6. Keywords: Fill in 5 keywords. Make sure keywords are relevant for your course.
Click the NEXT icon
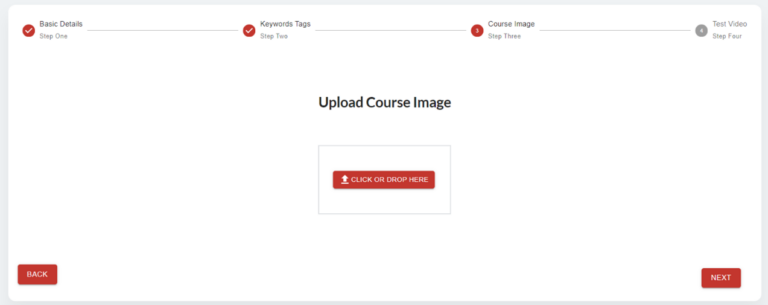
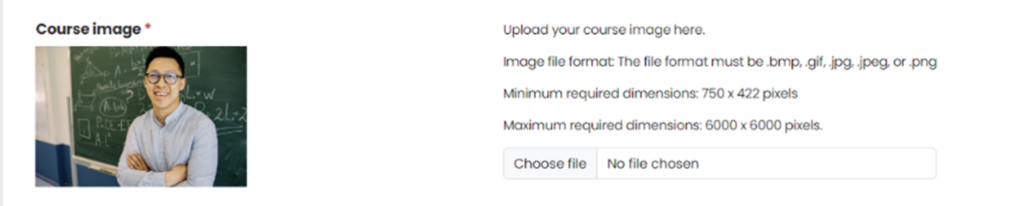
7. Course Image: Upload a course image for your course.
Click the NEXT icon
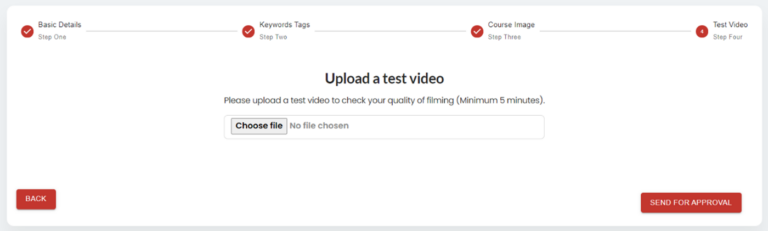
8. Test Video: Upload a test video to check the quality of filming.
Click the SEND FOR APPROVAL icon
9. Test Video Approval:You will receive a confirmation email once your test video is approved. If there are any issues with the video quality, you will receive feedback, and you can resubmit for approval after addressing the shortcomings.
10. Start Creating Course: Once the test video is approved the status will change to “Course creation in progress” and you can start creating your course by clicking on the MANAGE COURSE icon
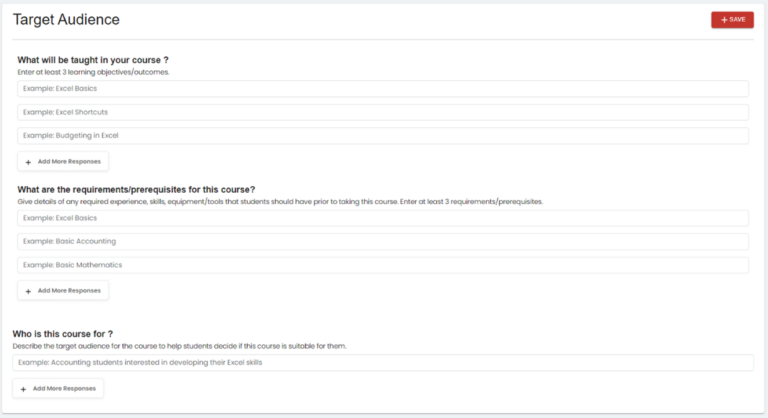
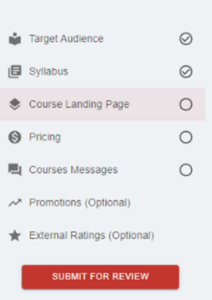
11. Target Audience: Fill in details for What is taught in the course, requirements/prerequisites and who the course is for.
Click the SAVE icon
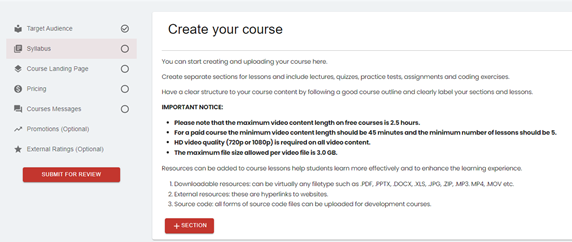
12. Syllabus: Click on the Syllabus
Click on the + SECTION icon.
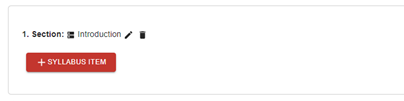
13. Add Section:
Add sections and lectures to your course. Each section should contain related lectures.
For each lecture, you can upload video content, add quizzes, practice tests, assignments, coding exercises or supplementary materials.
Arrange your lectures in a logical order.
Type in a Section Name and click on ADD icon.
14. Add Syllabus Item: Click on the + SYLLABUS ITEM
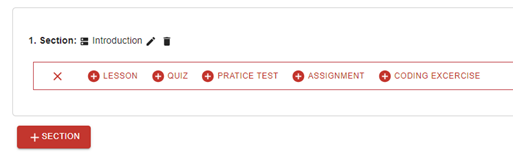
Now you can select LESSON (to add video and text-based lectures), QUIZ, PRACTICE TEST, ASSIGNMENT or CODING EXERCISE to add them to the Section.
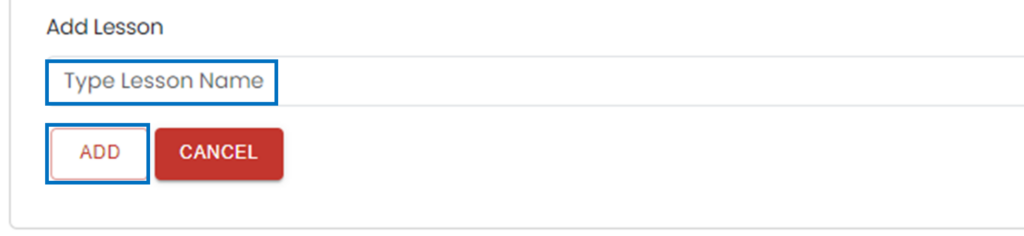
15. Add a Lesson: Click on the + LESSON icon.
Type in a Lesson Name and click on the ADD
Click on the + CONTENT icon.
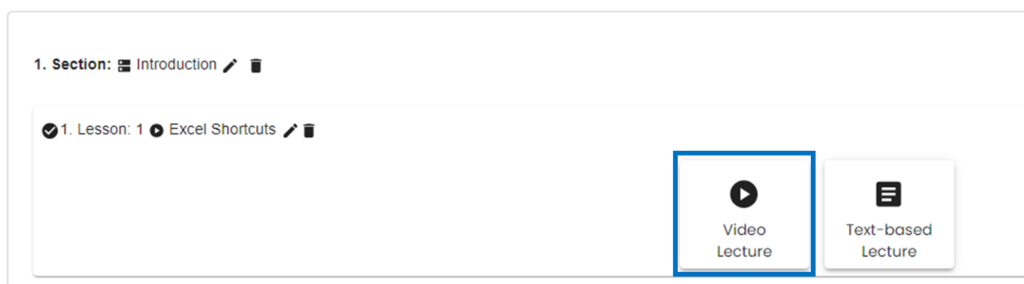
16. Add a Video Lecture: Click on the Video Lecture icon.
Click on Choose file and select the video lecture file to upload. Video file should be HD quality with a minimum resolution on 720p and maximum resolution of 1080p. The maximum file size is 3.0 GB.
You can make the video to free preview by setting the Free Preview Video toggle button to on position. Always have the introduction video set to preview. In addition it’s best practice to have a minimum of 2 to 3 videos or more on preview setting.
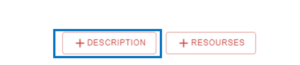
Click on + DESCRIPTION icon to add a description (optional).
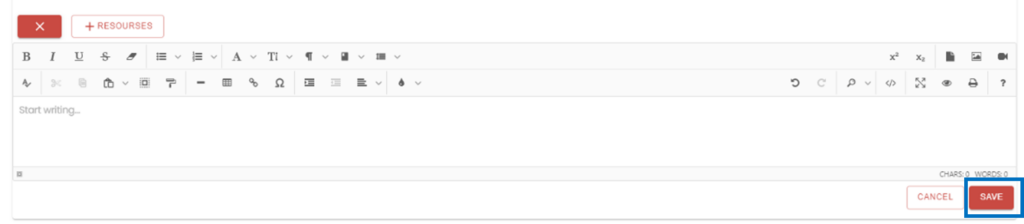
Type in a description and click on SAVE icon
Click on + RESOURCES icon to add resources (optional).
Resources can be added to course lessons help students learn more effectively and to enhance the learning experience.
Downloadable resources: can be virtually any filetype such as .PDF, .PPTX, .DOCX, .XLS, .JPG, .ZIP, .MP3. MP4, .MOV etc.
External resources: these are hyperlinks to websites.
Source code: all forms of source code files can be uploaded for development courses.
You can add downloadable files by clicking on the Choose file under the Downloadable file tab
To add external resources click on the External Resources tab
You can source code by clicking on the Source Code tab.
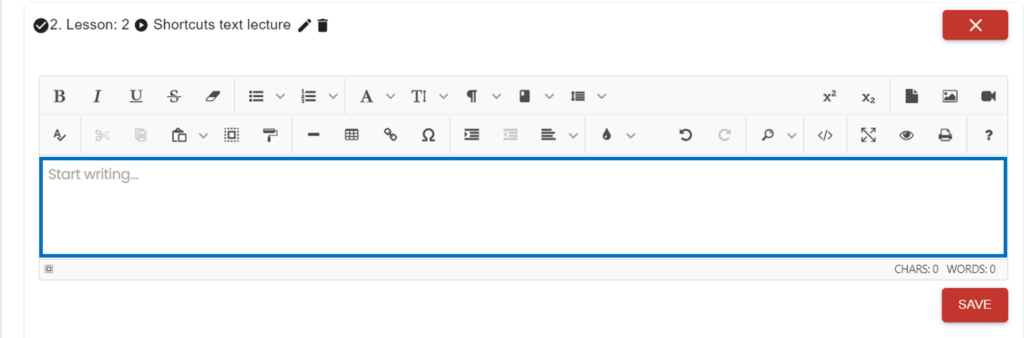
17. Add a Text based Lecture: Click on the Video Lecture icon.
Click on the + SYLLABUS ITEM
Click on the + LESSON
Type in a Lesson Name and click on the ADD
Click on the Text-based Lecture
Type in or copy paste lecture content in editor box.
Click on the SAVE
Add a description (optional). This is the same as for Video lecture (Section 16)
Add resources (optional). This is the same as for Video lecture (Section 16)
18. Rearranging lessons: You can move lessons up/down by clicking on right mouse button when the below symbol appears.
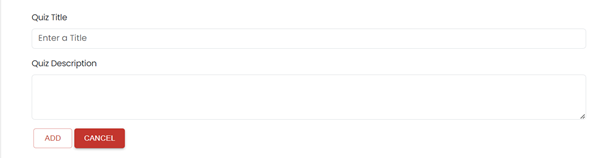
19. Add a Quiz:
Click on the + SYLLABUS ITEM
Click on the + QUIZ
Enter a Quiz Title and a Quiz Description.
Click on ADD
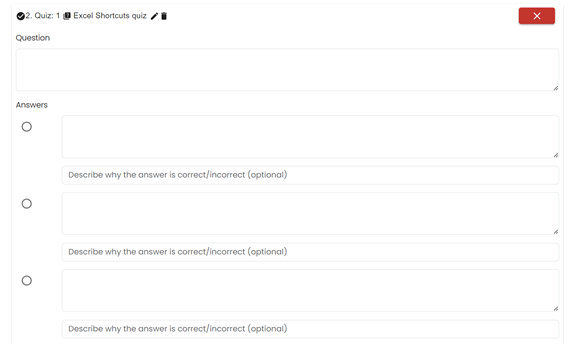
Click on + QUESTIONS icon
Click on Multiple Choice icon
Enter a question and minimum 2 answers. Description about answer is optional. Select the right answer.
Click on SAVE
You can continue adding more questions in the same way.
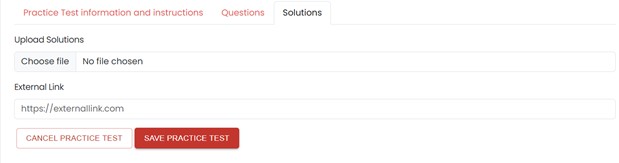
20. Add a Practice Test:
Click on the + PRACTICE TEST
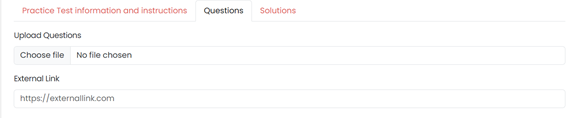
Enter Practice test information and instructions. External link is optional.
Upload questions file. External link is optional.
Upload Solutions file. External link is optional.
Click on SAVE PRACTICE TEST icon
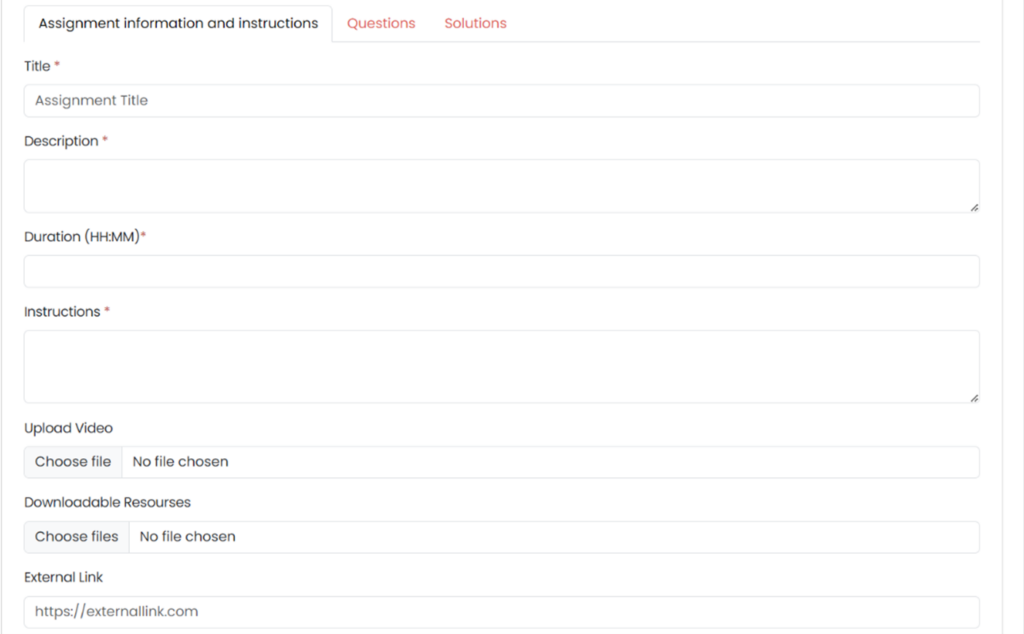
21. Add an Assignment:
Click on the + ASSIGNMENT
Enter Assignment information and instructions. Uploading video, downloadable resources and external link are optional.
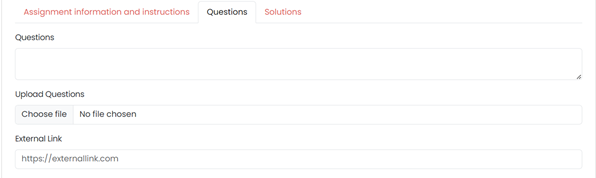
Enter questions details. Entering questions, uploading question files and external link are all optional (you can fill in or leave blank as you prefer).
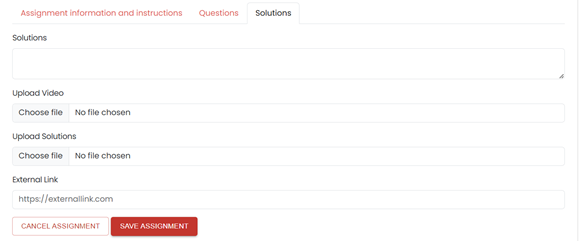
Enter solutions details. Entering solutions, uploading video, uploading solutions files and external link are all optional (you can fill in or leave blank as you prefer).
Click on SAVE ASSIGNMENT icon
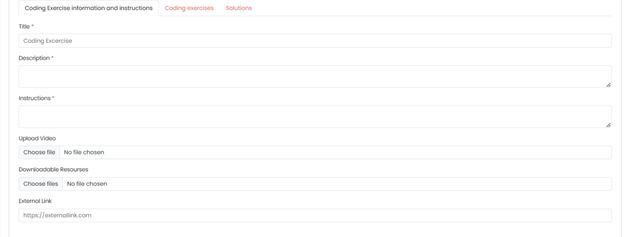
22. Add a Coding Exercise:
Click on the + CODING EXERCISE icon
Enter Coding exercise information and instructions. Uploading video, downloadable resources and external link are optional.
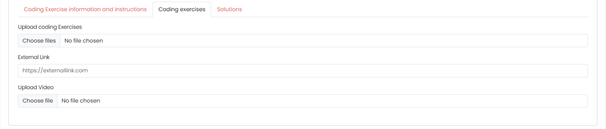
Enter Coding exercises details. Uploading coding exercise files, External link and Uploading video are all optional (you can fill in or leave blank as you prefer).
Enter Solutions details. Uploading solutions files, External link and Uploading video are all optional (you can fill in or leave blank as you prefer).
Click on SAVE CODING EXERCISE icon
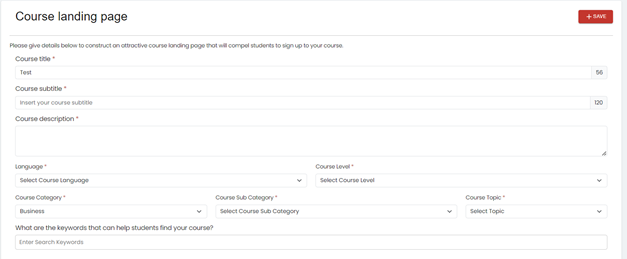
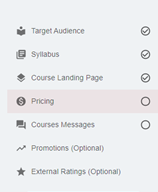
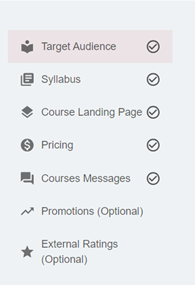
23. After completing Syllabus section click on Course Landing Page icon:
Fill in the details required for the Course landing page.
If your Course Topic is not available please select Other and input your course topic in the box provided.
The course image you have previously uploaded will be displayed here. You can upload a different course image if you wish.
Upload a promotional video.
Click on SAVE icon.
24. After completing Course Landing Page section click on Pricing icon:
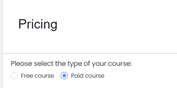
25. If you are creating a free course, click on the SAVE icon.
Please note that the maximum video content length on free courses is 2.5 hours.
26. If you are creating a Paid course, select Paid course icon.
Note: For a paid course the minimum video content length should be 45 minutes, and the minimum number of lessons should be 5.
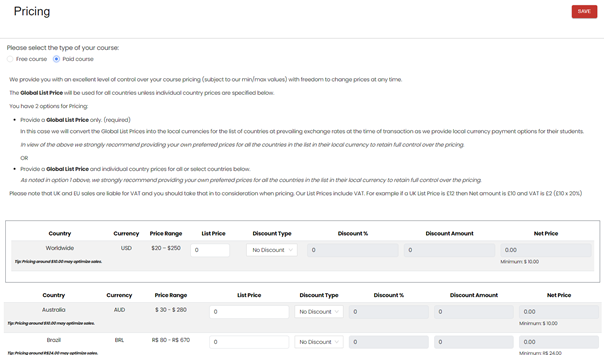
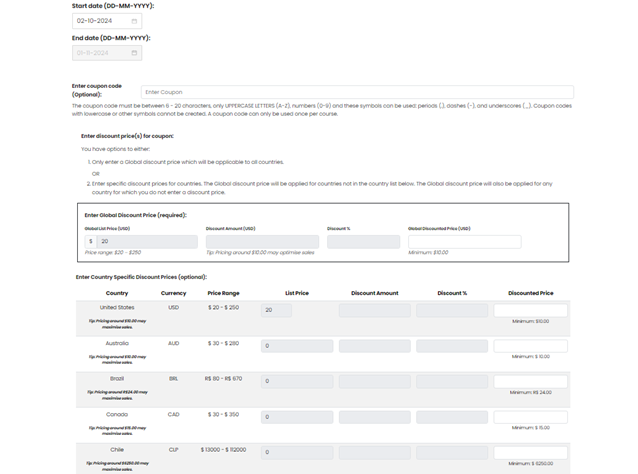
We provide you with an excellent level of control over your course pricing (subject to our min/max values) with freedom to change prices at any time. The pricing rules for each country are listed in the Aethenos Pricing Rules. We offer students the opportunity to pay for courses in their local currency for 28 currencies.
The Global List Price will be used for all countries unless individual country prices are specified below.
You have 2 options for Pricing:
Provide a Global List Price only. (required)
In this case we will convert the Global List Prices into the local currencies for the list of countries at prevailing exchange rates at the time of transaction as we provide local currency payment options for their students.
In view of the above we strongly recommend providing your own preferred prices for all the countries in the list in their local currency to retain full control over the pricing.
OR
Provide a Global List Price and individual country prices for all or select countries below.
As noted in option 1 above, we strongly recommend providing your own preferred prices for all the countries in the list in their local currency to retain full control over the pricing.
Please note that UK and EU sales are liable for VAT and you should take that in to consideration when pricing. Our List Prices include VAT. For example, if a UK List Price is £12 then Net amount is £10 and VAT is £2 (£10 x 20%.)
Enter Global List Price and individual country prices as you prefer including any discounts.
Click on the SAVE icon.
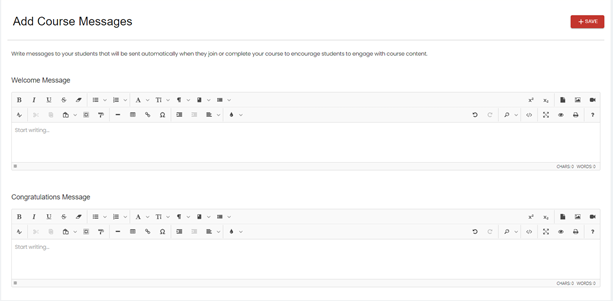
27. After completing Pricing section click on Course Messages icon:
Enter welcome message and congratulations message for students.
Click on the SAVE
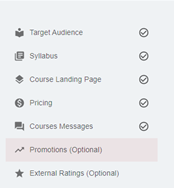
28. After completing Course Messages click on Promotions icon: This is optional, and you can complete it later when you require it.
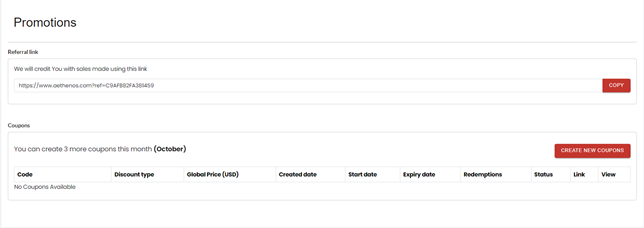
The Aethenos platform allows you to generate coupon codes and referral links to offer certain items of your Submitted Content to students at a discount, at Aethenos’s current price (which is decided by you), or for free, as permitted within the Services. These coupon codes and referral links are subject to limits, and you may not sell them on third-party websites or otherwise offer them in exchange for compensation. Additional information and restrictions on these coupon codes and referral links are outlined in our Trust & Safety policies.
Where a student applies your coupon code or referral link at checkout, your revenue share will be 97% of the Net Amount less any applicable deductions, such as student refunds.
You can copy the referral link to promote your course.
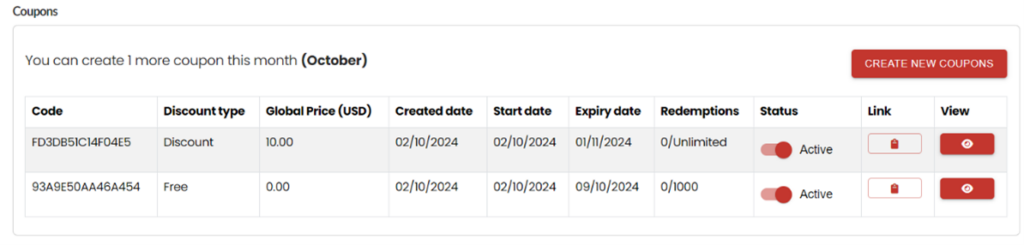
To create a coupon, click on the CREATE NEW COUPON icon
You can create up to 3 coupons per month for each course.
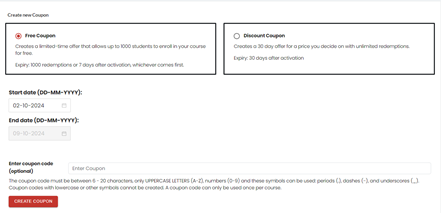
Two types of coupons can be created: Free and Discount
To create a Free coupon, select the start date, enter a coupon code (optional) and click on the CREATE COUPON Free coupons allow up to 1000 students to enrol in your course for free. Expiry is at 1000 redemptions or 7 days after activation, whichever comes first.
To create a Discount coupon, select Discount Coupon. This creates a 30 day offer for a price you decide on with unlimited redemptions.
Select the start date, enter a coupon code (optional), Global Discounted Price, country specific discounted prices (optional) and click on the CREATE COUPON icon
After creating coupons, you can deactivate and get links to share them from the coupon table.
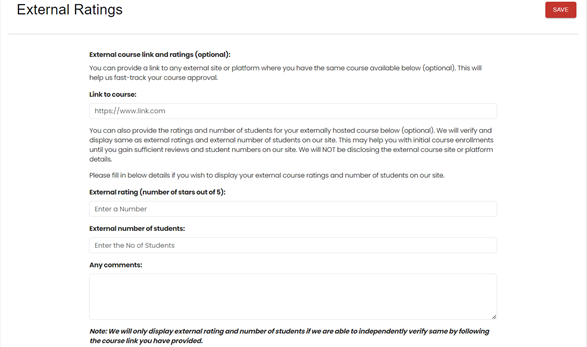
29. External Ratings: This is optional. To input click on the External Ratings icon.
You can provide a link to any external site or platform where you have the same course available. This will help us fast-track your course approval.
You can also provide the ratings and number of students for your externally hosted course (optional). We will verify and display same as external ratings and external number of students on our site. This may help you with initial course enrollments until you gain sufficient reviews and student numbers on our site. We will NOT be disclosing the external course site or platform details.
Once information is filled in click on the SAVE
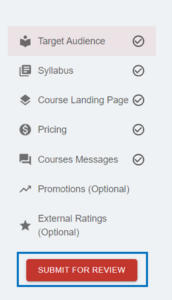
30. After all the required sections have been completed click on the SUBMIT FOR REVIEW icon.
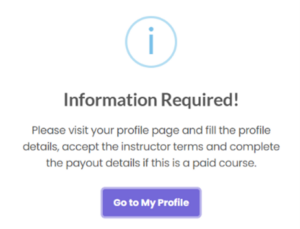
31. Click on the Go to My Profile icon.
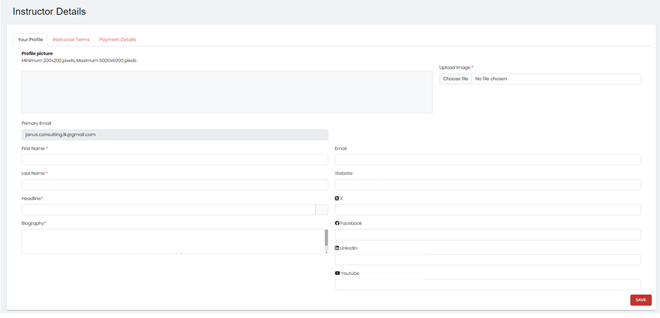
Fill in the Your Profile information and click on the SAVE icon.
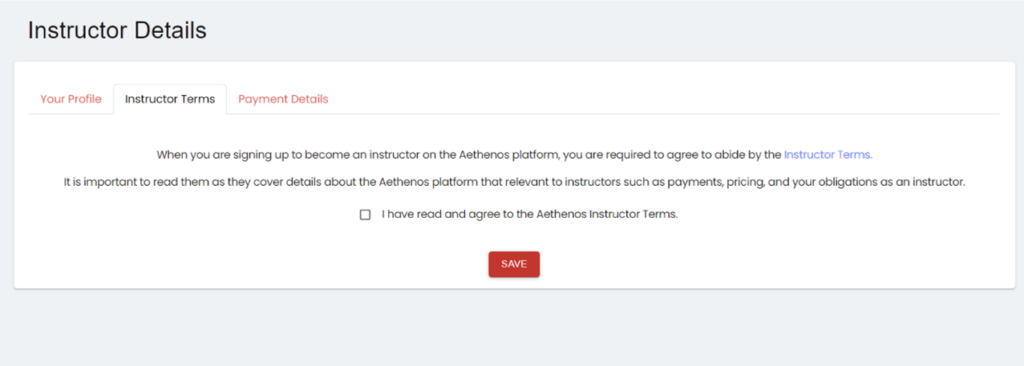
Agree to the Instructor Terms and click on the SAVE icon
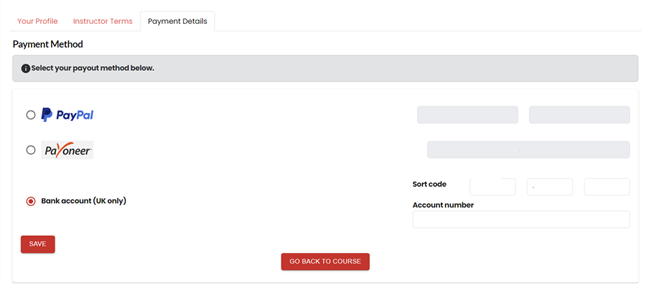
Enter Payment Details and click on the SAVE icon.
Click on the GO BACK TO THE COURSE
Click on the SUBMIT FOR REVIEW
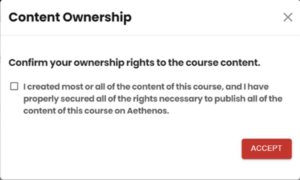
Confirm your ownership rights to the course content by ticking off the tick box and clicking on the ACCEPT
Now you will be directed to the Persona site for ID verification if this is the first time you are creating a course on our site. You will be required to upload a photo ID such as passport or driving licence and provide a selfie.
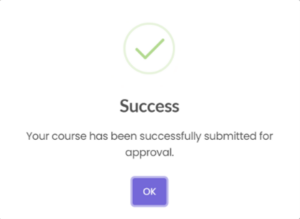
After successful ID verification, you will get following confirmation and an email confirmation.
After the course is approved you will get an email confirmation and a notification on your account. The status of the course will be changed to Approved.
Congratulations! Now your course in live on the Aethenos site.
In case there are any shortcomings in your course, we will provide feedback, and you can resubmit for approval once you have addressed the issues.
Now you can update the course if required by clicking on the MANAGE COURSE icon.